

Amazon Elastic Container Service (ECS) is a fully managed container orchestration service that simplifies the deployment, scaling, and management of containerized applications on AWS. AWS Fargate is a serverless compute engine for ECS, which eliminates the need to provision and maintain servers, enabling applications to scale automatically based on demand. In this blog, we’ll take you through the entire process—from building a Go application to running it as a fully managed containerized service on AWS.
We’ll begin by creating a Go application and containerizing it using Docker. Once the container image is ready, we’ll push it to Amazon Elastic Container Registry (ECR), ensuring a secure and scalable storage solution for our container images. You’ll learn how to set up an ECR repository, log in to ECR, tag the image, and push it to the registry.
Next, we’ll move on to deploying the containerized application on AWS ECS by creating and registering a task definition, setting up an ECS cluster, and defining a service. We’ll also explore how to access the web server and configure auto-scaling policies to dynamically adjust resources based on traffic and performance needs. Finally, we’ll discuss monitoring and logging using Amazon CloudWatch. You’ll learn how to set up CloudWatch alarms to track application health and performance metrics, ensuring your microservice runs optimally.
Prerequisites
Before we go into details, make sure you have the following prerequisites:
- Basic understanding of Go – If you're new to Go programming language, I recommend exploring some insightful articles here.
- Docker installed on your machine – If Docker isn’t set up yet, follow the installation guide here to get started with Docker on your system.
- An AWS account with CLI access – If you don’t have an AWS account, you can sign up for a free tier and configure the AWS CLI by following the steps in this guide.
- Understanding of ECS (Elastic Container Service) – Familiarity with ECS will help as we move forward.
Let’s dive in!
Create Go Application
The first step we are are going to do is to create a simple Go web server and containerize it using Docker. This server can easily handle increasing traffic by emlpoying ECS’s auto-scaling features.
Let's write webserver in main.go,
package main

import (
	"encoding/json"
	"log"
	"net/http"
	"time"
)

// Response struct for API response
type Response struct {
	Message   string    `json:"message"`
	Timestamp time.Time `json:"timestamp"`
}

// handler function for the API endpoint
func handler(w http.ResponseWriter, r *http.Request) {
	w.Header().Set("Content-Type", "application/json")
	response := Response{
		Message:   "Welcome to the Go App on ECS!",
		Timestamp: time.Now(),
	}
	json.NewEncoder(w).Encode(response)
}

// healthCheck handler to verify app health
func healthCheck(w http.ResponseWriter, r *http.Request) {
	w.WriteHeader(http.StatusOK)
	w.Write([]byte("OK"))
}

func main() {
	http.HandleFunc("/", handler)
	http.HandleFunc("/health", healthCheck) // health check endpoint
	log.Println("Server started on port 8080")
	log.Fatal(http.ListenAndServe(":8080", nil))
}
Test this locally:
go run main.goContainerize Go Microservice
Next, we'll create a Dockerfile to containerize this application. Create Dockerfile and write following in it:
# Start from a base Go image
FROM golang:1.23.2-bookworm

# Set the working directory inside the container
WORKDIR /app

# Copy the Go module files and download dependencies
COPY go.mod ./
RUN go mod download

# Copy the source code into the container
COPY . .

# Build the Go application
RUN go build -o main .

# Expose port 8080 for the web server
EXPOSE 8080

# Command to run the application
CMD ["./main"]
For more details about Dockerfile, please read this.
With this Dockerfile, we can build the container image for our Go application,
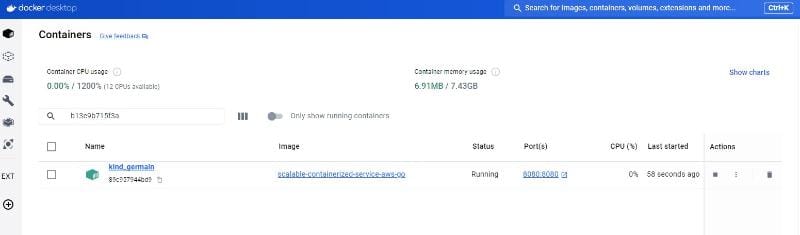
docker build -t scalable-containerized-service-aws-go .You can test this Docker image locally by running:
docker run -p 8080:8080 scalable-containerized-service-aws-goIt will start our application in a Docker container.
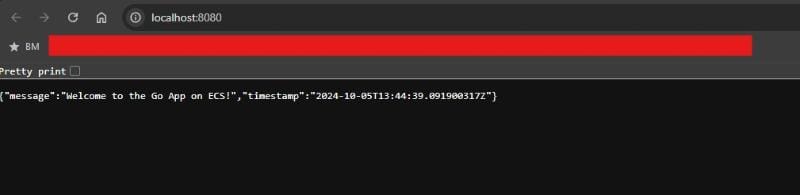
You should be able to access your Go application by writing http://localhost:8080 in broswer address bar. The container should respond with your API response.
Push the Image to Amazon ECR
Now that our containerized Go application works locally, the next step is to deploy it in a scalable and managed environment. This is where Amazon Elastic Container Registry (ECR) comes in. Amazon ECR (Elastic Container Registry) is a fully managed Docker container registry that allows you to securely store, manage, and deploy container images. It is integrated with Amazon ECS (Elastic Container Service), which helps in deploying containers at desired scale.
Here are the key benefits of using ECR:
- Fully Managed: No need to manage your own container registry infrastructure.
- Integrated Security: ECR automatically encrypts your container images at rest and provides fine-grained access control with AWS IAM.
- Seamless Integration: ECR integrates with ECS, simplifying the container orchestration and deployment process.
In next section, we’ll push our Docker image to ECR, so ECS can pull the image during deployment.
Create an ECR Repository
We create a new repository in ECR where you’ll push your Docker image using AWS CLI,
aws ecr create-repository --repository-name scalable-containerized-service-aws-go --region <aws-region>Login to ECR
Authenticate Docker to the ECR registry using AWS CLI:
aws ecr get-login-password --region <aws-region> | docker login --username AWS --password-stdin <aws-account-id>.dkr.ecr.<aws-region>.amazonaws.com/scalable-containerized-service-aws-goTag the Image
Tag the Docker image to match your ECR repository URI:
docker tag scalable-containerized-service-aws-go:latest <aws-account-id>.dkr.ecr.<aws-region>.amazonaws.com/scalable-containerized-service-aws-go:latestPush the Image to ECR
Push the Docker image to the ECR repository:
docker push <aws-account-id>.dkr.ecr.<aws-region>.amazonaws.com/scalable-containerized-service-aws-go:latest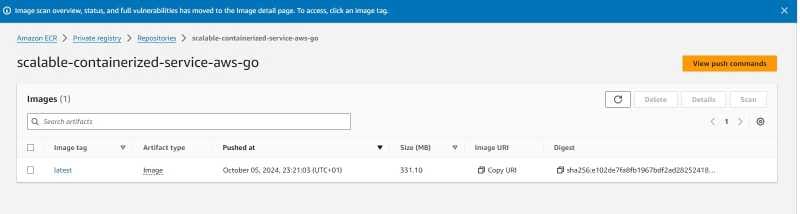
Deploy the Application on ECS
Now that our image is in ECR, we can deploy it using ECS. ECS provides two launch types: EC2 and Fargate. In this excercise, we'll use Fargate, which is serverless and abstracts infrastructure management.
Create a Task Definition
A Task Definition in AWS ECS serves as a blueprint for defining how your containerized application will run. It specifies important configuration details like the Docker image, resource allocation, and network mode.
In the below configuration, we create a task definition for our Go application named "go-app-task" using the Fargate launch type. The task defines a container "go-app-container", pulling the image from Amazon ECR, mapping port 8080 for traffic. It also assigns 256 CPU units and 512MB of memory, ensuring the container has the necessary resources. Finally, the executionRoleArn grants ECS permissions to execute the task securely.
{
  "family": "go-app-task",
  "networkMode": "awsvpc",
  "containerDefinitions": [
    {
      "name": "go-app-container",
      "image": "<aws-account-id>.dkr.ecr.<aws-region>.amazonaws.com/scalable-containerized-service-aws-go:latest",
      "portMappings": [
        {
          "containerPort": 8080,
          "protocol": "tcp"
        }
      ],
      "essential": true
    }
  ],
  "requiresCompatibilities": ["FARGATE"],
  "cpu": "256",
  "memory": "512",
  "executionRoleArn": "arn:aws:iam::<aws_account_id>:role/ecsTaskExecutionRole"
}
Register the task definition
To create the task definition, you can use the AWS CLI command aws ecs register-task-definition, which registers the task with ECS based on the JSON file provided. The command references your task-definition.json file, which contains the configuration details for your container. By running this command, ECS will register the task definition, making it available to launch in your ECS cluster. This step is crucial in defining how your Go application will be executed within your containerized environment on AWS.
aws ecs register-task-definition --cli-input-json file://task-definition.jsonCreate an ECS Cluster
An ECS cluster is a logical grouping of tasks or services. It provides the underlying infrastructure needed to deploy and manage your containerized Go applications. To create an ECS cluster, you can use the AWS CLI command aws ecs create-cluster, which provisions a new cluster for running your containerized applications. We define the name of the cluster, such as "go-app-cluster" by --cluster-name parameter. After creating the cluster, you can launch tasks or services within it, ensuring your application scales efficiently with AWS ECS.
aws ecs create-cluster --cluster-name go-app-clusterCreate a Service
Creating a service in ECS ensures that a specified number of tasks (containers) are always running and balanced across availability zones. By using the command aws ecs create-service, you can define the cluster where the service will run (go-app-cluster), the service name (go-app-service), and the task definition (go-app-task). The desired-count parameter sets the number of running tasks (in this case, 2), while the launch-type is set to FARGATE for serverless container management. The network configuration ensures the tasks run within specified subnets and security groups, with an option to assign a public IP for internet access.
aws ecs create-service \
    --cluster go-app-cluster \
    --service-name go-app-service \
    --task-definition go-app-task \
    --desired-count 2 \
    --launch-type FARGATE \
    --network-configuration "awsvpcConfiguration={subnets=[subnet-abc123],securityGroups=[sg-abc123],assignPublicIp=ENABLED}"
Note: For simplicity, this example uses the default subnet and security groups. However, you can customize these with more appropriate values based on your specific networking and security requirements.
Access the Web Server
Since we have assignPublicIp=ENABLED, our ECS tasks (containers) should each get a public IP.The public IP will allow you to access the web server from outside the VPC (e.g., via the internet).
Use the following command to describe your service and check the status of the running tasks:
aws ecs describe-services --cluster go-app-cluster --services go-app-serviceOnce you have the task ARNs, describe the tasks to get their public IP addresses:
aws ecs describe-tasks --cluster go-app-cluster --tasks <task-arn>In the output, look for the public IP address of each task under the networkInterfaces section.
Once you have the public IP address, you can open a browser and access the web server by entering:
http://<public-ip>:8080Make sure the security group sg-abc123 allows inbound traffic on port 8080 from your IP address (or the public internet). You can update it if necessary using:
aws ec2 authorize-security-group-ingress \
  --group-id sg-abc123 \
  --protocol tcp \
  --port 8080 \
  --cidr 0.0.0.0/0
Auto-Scaling the Service
To effectively manage changing traffic demands, Amazon ECS offers the capability to auto-scale services based on CloudWatch metrics. This allows your application to dynamically adjust its resources according to real-time CPU or memory usage.
Auto Scaling Policy
By creating an Application Auto Scaling Policy, you can set parameters for the minimum and maximum number of running tasks. For instance, the command aws application-autoscaling register-scalable-target specifies the service's resource ID and establishes a scalable target with a minimum capacity of one task and a maximum of five.
aws application-autoscaling register-scalable-target \
    --service-namespace ecs \
    --scalable-dimension ecs:service:DesiredCount \
    --resource-id service/go-app-cluster/go-app-service \
    --min-capacity 1 \
    --max-capacity 5
Once the scalable target is set, you can create a scaling policy to define how the service responds to changes in demand. Using the command aws application-autoscaling put-scaling-policy, you can establish a target tracking scaling policy, such as the ecs-scale-out-policy. This policy allows ECS to automatically increase the number of running tasks when the average CPU utilization exceeds a specified target value (in this case, 50%). You can also configure cooldown periods for scaling in and out to ensure stability during rapid traffic changes. This auto-scaling functionality empowers your application to maintain optimal performance while efficiently managing costs.
aws application-autoscaling put-scaling-policy \
    --service-namespace ecs \
    --scalable-dimension ecs:service:DesiredCount \
    --resource-id service/go-app-cluster/go-app-service \
    --policy-name ecs-scale-out-policy \
    --policy-type TargetTrackingScaling \
    --target-tracking-scaling-policy-configuration "TargetValue=50.0,PredefinedMetricSpecification={PredefinedMetricType=ECSServiceAverageCPUUtilization},ScaleInCooldown=300,ScaleOutCooldown=300"
Monitoring with CloudWatch
Amazon ECS integrates with Amazon CloudWatch, providing monitoring capabilities for your containerized applications. This integration allows you to track essential metrics such as CPU utilization, memory usage, and task counts, enabling you to gain insights into the performance and health of your services. In CloudWatch, you can set up alarms that trigger notifications when specified thresholds are exceeded, which keep you informed about potential issues before they impact your application.
Create a CloudWatch Alarm
To create a CloudWatch Alarm, you can use the command aws cloudwatch put-metric-alarm. For example, by defining an alarm named HighCPUUtilization, you can monitor the CPU utilization metric for your ECS service. This alarm is configured to trigger when the average CPU utilization exceeds 80% over a specified period (300 seconds) and remains above this threshold for two consecutive evaluation periods. By linking the alarm to an SNS topic, you can receive immediate notifications if the CPU usage reaches critical levels, allowing you to take proactive measures to maintain optimal performance and resource allocation. This monitoring approach is essential for ensuring the reliability and efficiency of your Go microservices running on AWS ECS.
aws cloudwatch put-metric-alarm \
    --alarm-name HighCPUUtilization \
    --metric-name CPUUtilization \
    --namespace AWS/ECS \
    --statistic Average \
    --period 300 \
    --threshold 80 \
    --comparison-operator GreaterThanOrEqualToThreshold \
    --dimensions "Name=ClusterName,Value=go-app-cluster" "Name=ServiceName,Value=go-app-service" \
    --evaluation-periods 2 \
    --alarm-actions arn:aws:sns:us-east-1:<aws_account_id>:my-sns-topic
Conclusion
In this guide, we've covered how to containerize a Go application, deploy it to AWS ECS using Fargate, and set up auto-scaling and monitoring. By leveraging ECS and Fargate, you can easily scale your applications without worrying about infrastructure management. This setup allows your Go applications to handle varying workloads efficiently and provides a foundation for building resilient, scalable microservices.