Part 5: Creating WordPress Custom Templates and The Loop
In our ongoing journey to create a WordPress theme from the ground up, we’ve already covered the basics of theme structure and added essential elements like headers and menus. Now, in Part 5 of our series, it’s time to delve into the world of wordpress custom templates and the loop, that will enable us to master the art of presenting our content in a unique and engaging way.
Template Files and Their Purpose
Before we dive into creating custom templates, let’s begin with the basics. “In WordPress, template files actively determine how different types of content present on your website. It’s crucial to comprehend the core template files and their roles. Here are some key players:
index.php: This is the default fallback template used when a more specific template file isn’t available. It’s a versatile template that you can customize to your heart’s content.single.php: If you’re showcasing individual blog posts, the ‘single.php’ template is your canvas. It controls the layout and design for your blog articles.page.php: For static pages like yourAboutorContactpage, thepage.phptemplate ensures a consistent and structured presentation.
Each of these templates provides a structured framework for displaying content. However, what if you want to take it a step further and tailor your design to specific content types, like archive pages or category listings? That’s where custom templates come into play.
Building Custom Templates for Different Content Types
Custom templates are your main tools for creating a visually engaging and user-friendly website. Here are a couple of custom templates that you might find incredibly useful:
archive.php: This template is your go-to choice when you want to present a chronological list of blog posts. It serves as the backbone of your archive page, ensuring that your content is organized and easy to navigate.category.php: When you want to give special treatment to posts within a specific category, thecategory.phptemplate empowers you to customize how posts in that category are displayed. This helps you make them visually distinct from the rest.
Creating custom templates gives you the creative freedom to design unique layouts for different content types. This not only enhances the user experience but also maintains a consistent design throughout your website. You can craft custom templates for tags, custom post types, and more, tailoring your theme to suit your content perfectly.
Implementing The Loop to Display Content
Now that we’ve covered what the template files are, let’s talk about how to actually display content within these templates. This is where “The Loop” comes into play. The Loop is a fundamental concept in WordPress theming, allowing you to retrieve and dynamically present your content.
Here’s a simplified example of how The Loop works:
<?php if (have_posts()) : while (have_posts()) : the_post(); ?>
    <!-- Your content display code here -->
    <h2><a href="<?php the_permalink(); ?>"><?php the_title(); ?></a></h2>
    <div class="entry-content">
        <?php the_content(); ?>
    </div>
<?php endwhile; else : ?>
    <p>No content found.</p>
<?php endif; ?>
This code checks if there are posts to display, and if so, it iterates through them, displaying the title and content. If there are no posts, it shows a simple “No content found” message.
By utilizing The Loop in your custom templates, you can effortlessly bring your content to life, ensuring you present it consistently and dynamically across your website.
Example: Writing an index.php File
Now that we’ve covered the basics of custom templates and The Loop, let’s put our knowledge into practice. Suppose you want to create an index.php template that displays a list of blog posts on your homepage.
Here’s a simplified example of what your index.php file could look like:
<?php get_header(); ?>

<div class="container">
    <div class="row">
        <div class="col-md-8">
            <?php
                $paged = (get_query_var('paged')) ? get_query_var('paged') : 1;
                $args = array(
                    'posts_per_page' => 10,
                    'paged' => $paged
                );
                $query = new WP_Query($args);
            ?>
            <?php if ($query->have_posts()) : ?>
                <?php while ($query->have_posts()) : $query->the_post(); ?>
                    <article <?php post_class(''); ?>>
                        <div class="row">
                            <h2><a class="no-underline" href="<?php the_permalink(); ?>"><?php the_title(); ?></a></h2>
                            <div class="post-author-date">
                                <i class="fas fa-user"></i>
                                <span class="post-by">By <?php the_author(); ?></span>,
                                <i class="far fa-calendar"></i>
                                <span class="post-date"><?php the_date(); ?></span>
                            </div>
                            <div class="featured-image-home col-md-12 pt-2 d-flex align-items-center justify-content-center">
                                <?php if (has_post_thumbnail()) : ?>
                                    <a href="<?php the_permalink(); ?>"><?php the_post_thumbnail(); ?></a>
                                <?php endif; ?>
                            </div>
                        </div>
                        <div class="row">
                            <div class="home-post-excerpt pt-3">
                                <?php the_excerpt(); ?>
                            </div>
                            <div class="mt-2 d-flex justify-content-end">
                                <a href="<?php the_permalink(); ?>" class="btn btn-primary">Read More</a>
                            </div>
                        </div>
                        <div class="row mt-5"></div>
                    </article>
                <? endwhile; ?>

            <?php else : ?>
                <p><?php _e('No posts found.', 'your-theme-text-domain'); ?></p>
            <?php endif; ?>

            <?php wp_reset_postdata(); ?>
        </div>
    </div>
</div>

<?php get_footer(); ?>
This code is responsible for creating a dynamic list of blog posts, making it easy for visitors to explore your site’s latest content. Let’s break it down step by step:
First of all, this PHP code dynamically sets the page number based on the paged query variable. If paged is not set, it defaults to 1, ensuring that the homepage displays the first page of posts. The args array specifies query parameters, including the number of posts to display per page, which in this case is set to 10. A new instance of WP_Query is then created using these arguments.
The heart of this template is The Loop. It checks if there are posts to display with the conditional if ($query->have_posts()). If posts are available, the loop iterates through them one by one, displaying the title, author, date, featured image, and an excerpt for each post. This structured layout provides a user-friendly and visually appealing way to present your blog content. If there are no posts to display, it shows a message indicating that no posts were found.
Finally, the loop concludes with wp_reset_postdata(), ensuring that any subsequent content displayed on the page behaves as expected.
To maintain a consistent and visually appealing display of featured images, we’ve set specific image dimensions in our style.css file as follows,
.featured-image-home img {
    width: 500px;
    height: 300px;
}
You can choose size of the featured image as per your choice.
Displaying Featured Image
By default, WordPress does not offer the option to include a featured image, while writing a blog. To enable this functionality in our theme, we need to make a specific adjustment within our theme’s functions.php file. Here’s the code snippet to add the support of featured image:
function setup_theme() {
    add_theme_support('title-tag');
    add_theme_support('post-thumbnails');
}
add_action('after_setup_theme', 'setup_theme');
After adding the function mentioned above, you should now have the ability to add featured images to your blog posts.
Adding Post Category
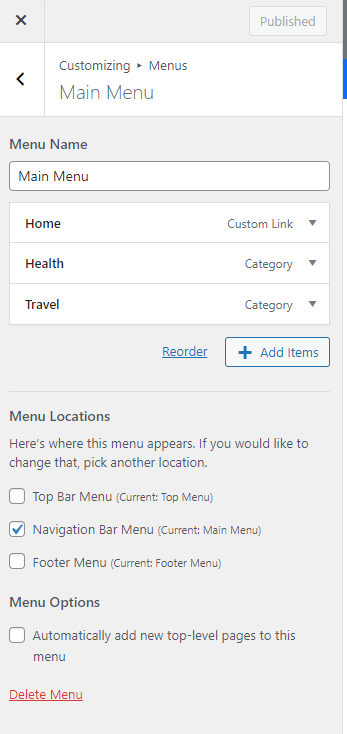
In the previous section, we discusssed about created a couple of blog posts for demonstration purposes. We can assign them to distinct categories, let’s say, Health and Travel. In the next step, we will incorporate these categories into the menu displayed in the navigation bar.
Let’s add those categories into our Main Menu.
If you follow all the above steps properly, our “My Cool Blog” website should look like this,

In this part of our ongoing series on WordPress theme development, we’ve looked over different types of theme templates, such as index.php, single.php, and category.php. We’ve also explained the process of creating an effective index.php template, complete with The Loop for seamlessly presenting all the blog posts on your homepage.
Our journey of WordPress theme creation is far from over. In the upcoming chapters, we’ll explore even more interesting topic of theme development. Stay tuned for more insights and knowledge-sharing in the next installment!