Part 4: Setting up Navigation Menus in WordPress Theme development
In any website, navigation menus play a vital role. Think of them as friendly guides that help visitors find their way around your website. Getting these guides right is super important. So, in this blog post, we’ll take you through the whole process of setting up navigation menus in WordPress. We’ll show you how to decide where your menus should go, create custom menus, and make sure they fit perfectly into your website’s top and bottom sections.
Define Menu Locations
Step 1: Identifying Navigation Needs
Before diving into the technical details, take a moment to consider your website’s structure. Think about the types of navigation menus you need. Common options include the primary menu, secondary menu, and footer menu. These menus often serve distinct purposes, such as guiding users to essential pages, showcasing secondary content, and offering links to policies or contact information.
Step 2: Register Menu Locations
You can define these menu locations using the functions.php file. To do this, you’ll use the register_nav_menus function. Here’s an example:
function register_custom_menus() {
    register_nav_menus(
        array(
            'top-bar-menu' => esc_html__('Top Bar Menu', 'your-theme-textdomain'),
            'navigation-bar-menu' => esc_html__('Navigation Bar Menu', 'your-theme-textdomain'),
            'footer-menu' => esc_html__('Footer Menu', 'your-theme-textdomain')
        )
    );
}
add_action('after_setup_theme', 'register_custom_menus');
In above code, we’re registering three menu locations: top-bar-menu, navigation-bar-menu and footer-menu. The text domain (‘your-theme-textdomain’) is used for language translation and should match your theme’s defined text domain.
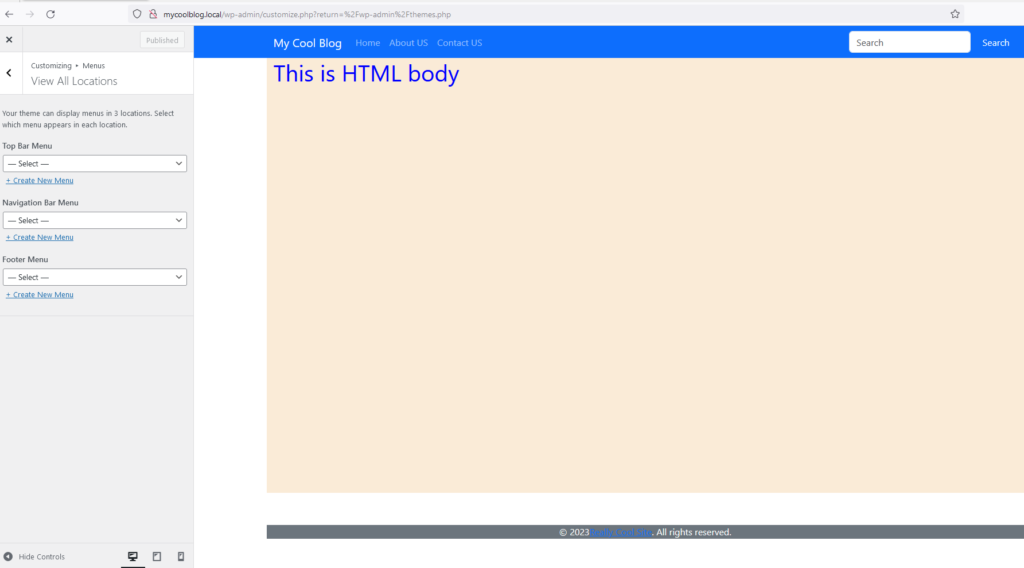
To confirm if the menu locations have been successfully added, head over to the WordPress Customizer menu. You should spot all three menu locations right there.
Create Menus
Step 3: Access the WordPress Dashboard
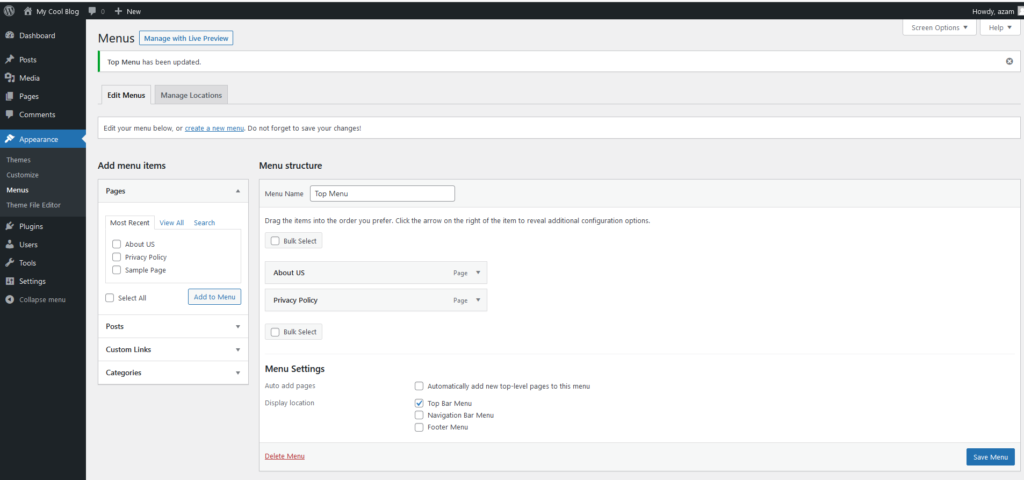
Now that your menu locations are established, it’s time to create custom menus. Navigate to the WordPress admin dashboard and select “Appearance” > “Menus.” Here, you’ll find an interface for managing your menus.
Step 4: Create a New Menu
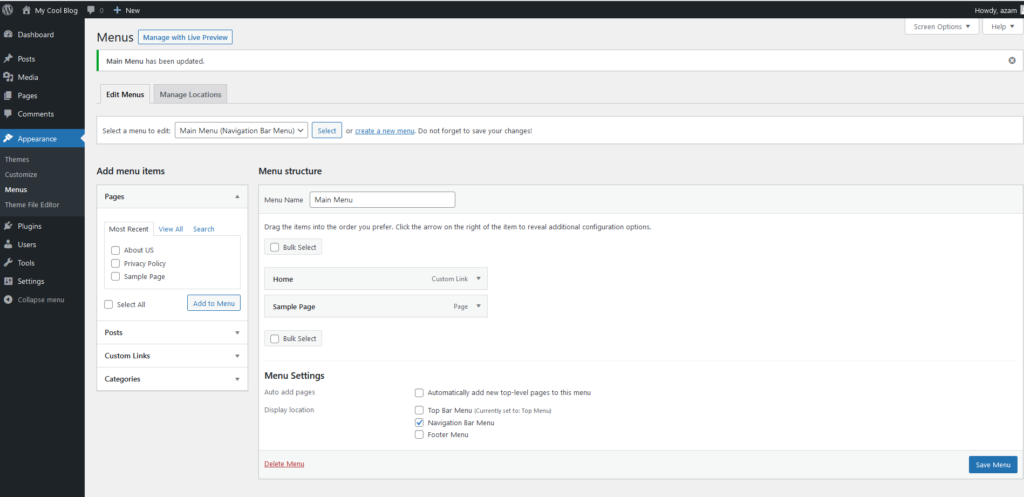
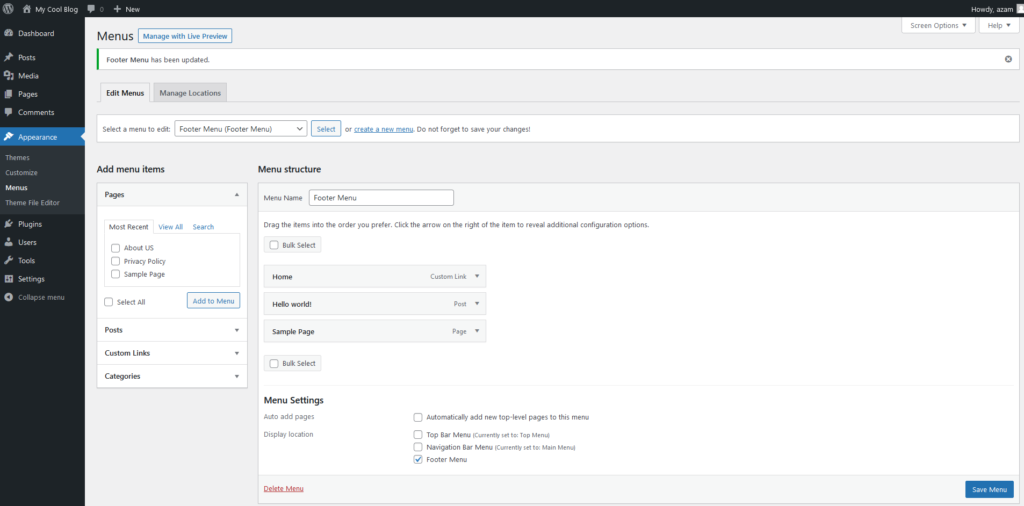
Click on “Create a new menu” and give it a meaningful name, such as “Top Bar Menu.” Afterward, click the “Create Menu” button. You can repeat this step to create additional menus for your secondary and footer menu locations.
Step 5: Add Menu Items
To populate your menu, select from the available pages, posts, custom links, or categories in the left panel and click “Add to Menu.” You can drag and drop items to arrange them as needed. Don’t forget to save your menu once it’s configured.
- Create a Top bar menu
- create two pages, privacy policy and About us
- Add both in Top Menu
Top Bar Menu
Navigation Bar Menu
Footer Menu
Include Navigation in Header and Footer
Step 6: Modify ‘header.php’ and ‘footer.php’
In previous part we create top bar menu, and added menu items manually, now we just load menu just created in previous step,
<nav class="navbar navbar-expand-sm navbar-dark bg-secondary">
  <div class="container">
    <a class="navbar-brand" href="<?php echo home_url(); ?>"><?php echo bloginfo('name'); ?></a>
    <button class="navbar-toggler" type="button" data-bs-toggle="collapse" data-bs-target="#topnavbar">
      <span class="navbar-toggler-icon"></span>
    </button>
    <div class="collapse navbar-collapse" id="topnavbar">
        <?php
          wp_nav_menu(array(
              'theme_location' => 'top-bar-menu',
              'menu_class' => 'navbar-nav me-auto',
              'container' => '',
              'items_wrap' => '<ul id="%1$s" class="%2$s">%3$s</ul>',
          ));
        ?>
      <form class="d-flex">
        <input class="form-control me-2" type="text" placeholder="Search">
        <button class="btn btn-primary" type="button">Search</button>
      </form>
    </div>
  </div>
</nav>
add some styles to menu items in style.css to remove underline and show them as “not list”
.navbar-nav li {
    list-style: none;
    display: inline;
}

.navbar-nav a {
    color: white;
    padding: 15px;
    text-align: center;
    display: inline-block;
    text-decoration: none;
}

.navbar-brand {
    font-size: 24px;
    color: blue
}
now we will add another menu,so lets arrange our code..
create a template directory
create top-bar-menu.php file and move our menu code in this file
<nav class="navbar navbar-expand-sm navbar-dark bg-primary">
  <div class="container">
    <button class="navbar-toggler" type="button" data-bs-toggle="collapse" data-bs-target="#mynavbar">
      <span class="navbar-toggler-icon"></span>
    </button>
    <div class="collapse navbar-collapse" id="mynavbar">
        <?php
          wp_nav_menu(array(
              'theme_location' => 'navigation-bar-menu',
              'menu_class' => 'navbar-nav me-auto',
              'container' => '',
              'items_wrap' => '<ul id="%1$s" class="%2$s">%3$s</ul>',
          ));
        ?>
    </div>
  </div>
</nav>
create another file for main navigation bar menu, name it navigation-bar-menu.php
Footer.php
<footer class="site-footer container text-white bg-primary">
<?php
wp_nav_menu(array(
'theme_location' => 'footer-bar-menu',
'menu_class' => 'navbar-nav me-auto',
'container' => '',
'items_wrap' => '<ul id="%1$s" class="%2$s">%3$s</ul>',
));
?>
</footer>
<?php wp_footer(); ?>
<div class="container bg-secondary text-white d-flex justify-content-center">
© <?php echo date("Y"); ?> <a href="https://reallycoolwebsite/">Really Cool Site</a>. All rights reserved.
</div>
</body>
</html>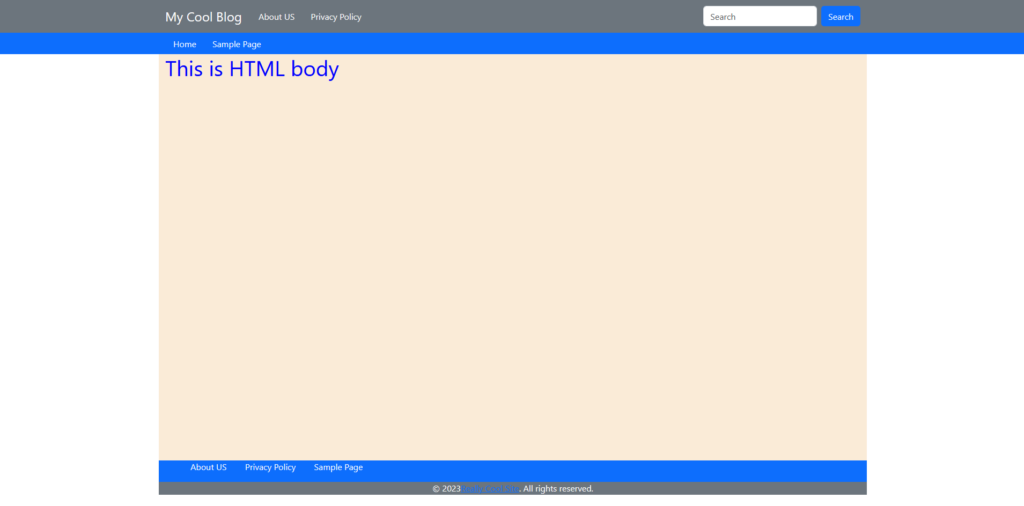
We’ve now learned how to set up and manage navigation menus in WordPress. By defining menu locations, creating custom menus, and integrating them into your website’s header and footer, you’re well on your way to providing an intuitive and user-friendly browsing experience for your visitors. Tailoring your navigation menus to your website’s unique needs will undoubtedly enhance its overall appeal and usability. Happy navigating!