Expanding on my previous article that explained setting up a Jenkins server on an AWS EC2 instance with Ubuntu OS, this article will explain how to create a multibranch Jenkins pipeline. You'll learn to configure Git webhooks to trigger the pipeline and build projects written in Go. Get ready to unlock the power of multibranch Jenkins pipeline!
Jenkins, is a popular open-source automation service, thanks to its ability to build, test, and deploy software efficiently. However, for complex, large-scale projects spreading across multiple teams, the traditional build pipeline model may introduce errors and delays. The Jenkins multibranch pipeline offers a valuable solution to address these challenges.
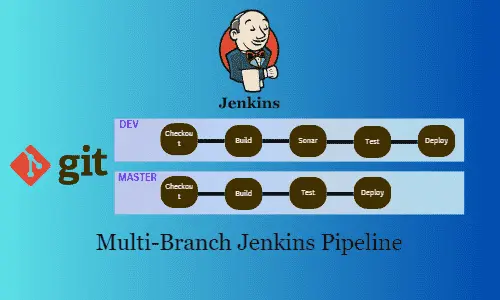
What is a Multi-Branch Pipeline?
A multi-branch Jenkins pipeline simplifies build processes for multiple parallel branches from a source code repository, such as git, by automatically detecting and creating jenkins pipelines for each branch. This eliminates the manual creation and configuration of pipelines for each branch, saving time and reducing the potential for errors. More importantly, it also takes care of clean-up tasks, meaning that if we delete a branch, it automatically removes the corresponding Jenkins pipeline associated with that branch.
Customizing these pipelines through a Jenkinsfile allows you to define the necessary stages for building, testing, and deploying code changes tailored to different branch requirements. For example, you can add an additional testing stage for pull requests or skip certain stages for branches that involve minor modifications.
Alright, that's enough theory for now. Let's dive in and start practicing.
Although you can install Jenkins on any computer, in this post, I'll demonstrate how to run Jenkins on an AWS EC2 instance. By following this article, you will be able to:
- Optional: Install and configure Jenkins on an AWS EC2 Instance, refer to my previous post for guidance.
- Setup a build environment for Go Language on Jenkins
- Optional: Create a jenkins test pipeline to verify Go installation
- Install the necessary jenkins plugins, i.e.
Multibranch Scan Webhook Trigger - Create and Configure Jenkins multibranch pipeline
- Utilize webhooks to trigger Jenkins with Git pushes
Install GO Plugin
Since we will be building a Go project using Jenkins pipeline, it's necessary to install the Go Plugin on Jenkins. Follow these steps to do so:
- Go to the Jenkins dashboard.
- Click on "Manage Jenkins" on the left sidebar and select "Manage Plugins" from the options.
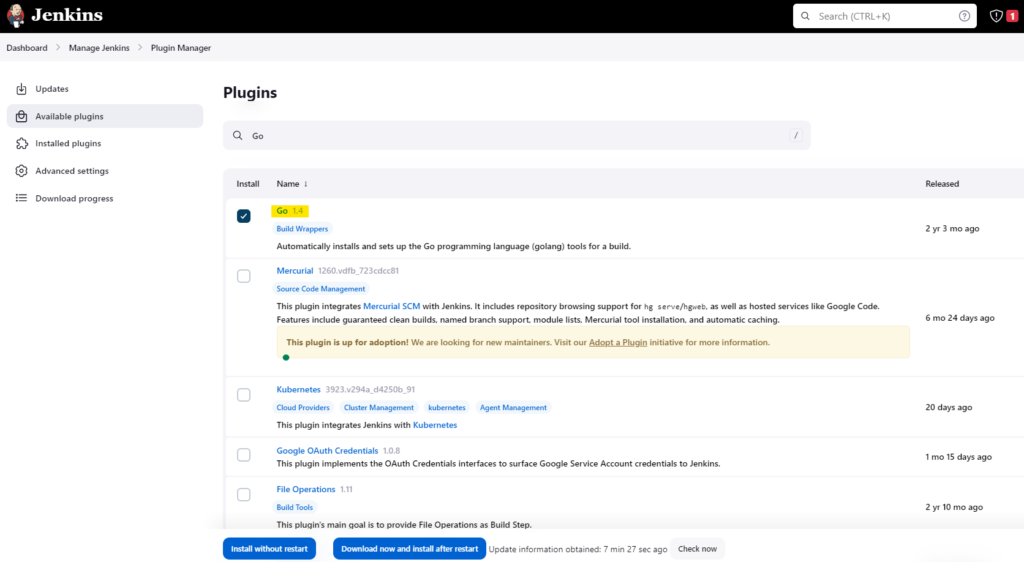
- In the "Manage Plugins" section, click on the "Available" tab.
- In the search box, type "Go", select "Go" plugin and click on the "Download now and install after restart" button.
- Wait for the plugin installation process to complete.
- Restart Jenkins to complete the installation.
Configure GO
To configure Go plugin follow these steps:
- Go to the Jenkins dashboard.
- Click on "Manage Jenkins" on the left sidebar.
- Select "Global Tool Configuration" from the options.
- Scroll down to the "Go" section.
- Click on the "Add Go" button.
- Enter a name for the Go installation, as I will be using Go version 1.18 so I name it as "1.18".
- Select the version of Go you want to install, I use version 1.18.
- Click on the "Save" button to apply the changes.
With the Go environment successfully configured, you can now utilize the Go Lang Plugin in your Jenkins jobs for building, testing, and deploying Go projects.
Verify GO installation - Optional
This is an optional section, aims to guide you on how to verify if the installation and configuration of Go are working correctly. If you are confident that your Go installation is in good shape, you can skip this section.
- In the Jenkins dashboard and click on "New Item" to create a new pipeline job.
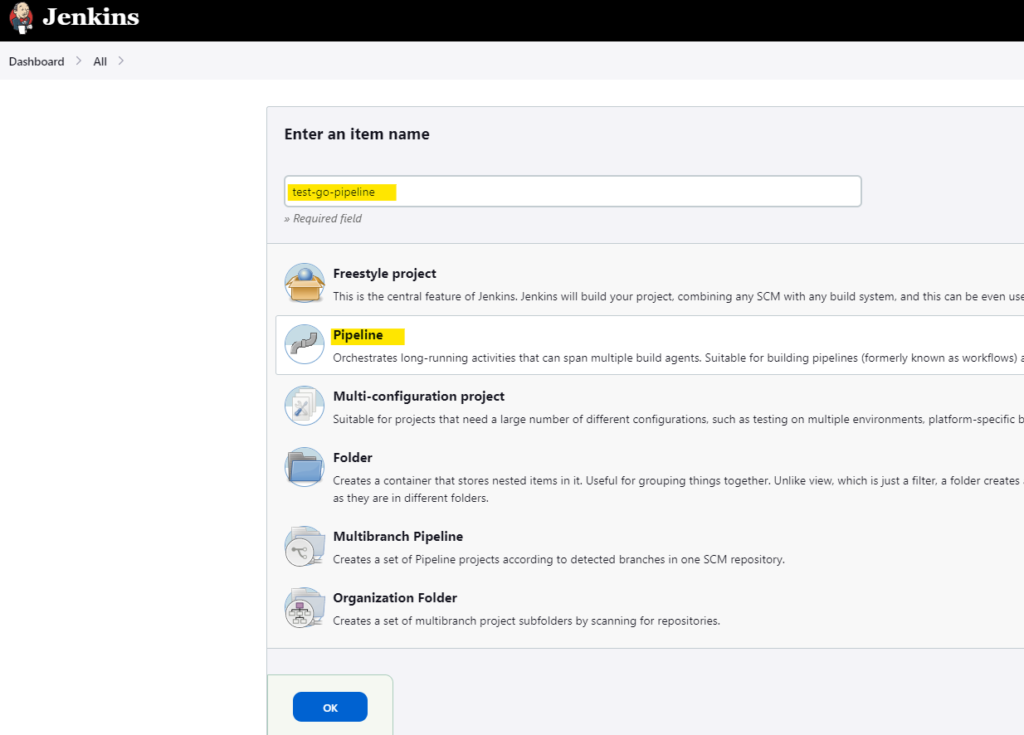
- Name your project and select "Pipeline" as the project type, then click "OK" to create the job.
- In the "Pipeline" section, select "Pipeline script" as the definition and paste the following script in the script section:
pipeline {
    agent any

    tools {
        go '1.18'
    }

    stages {
        stage('Go Version') {
            steps {
                sh 'go version'
            }
        }

    }
}- Click on "Save" to save your job.
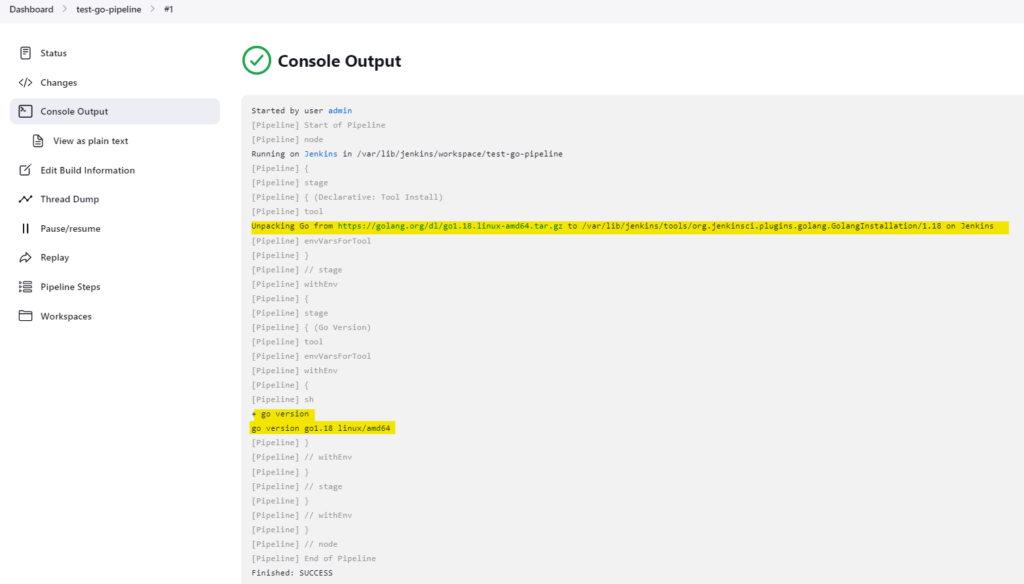
- Click on "Build Now" to trigger
Jenkins will install the GO language version 1.18 (or your selected version) from golang.org/.. and then print go version.
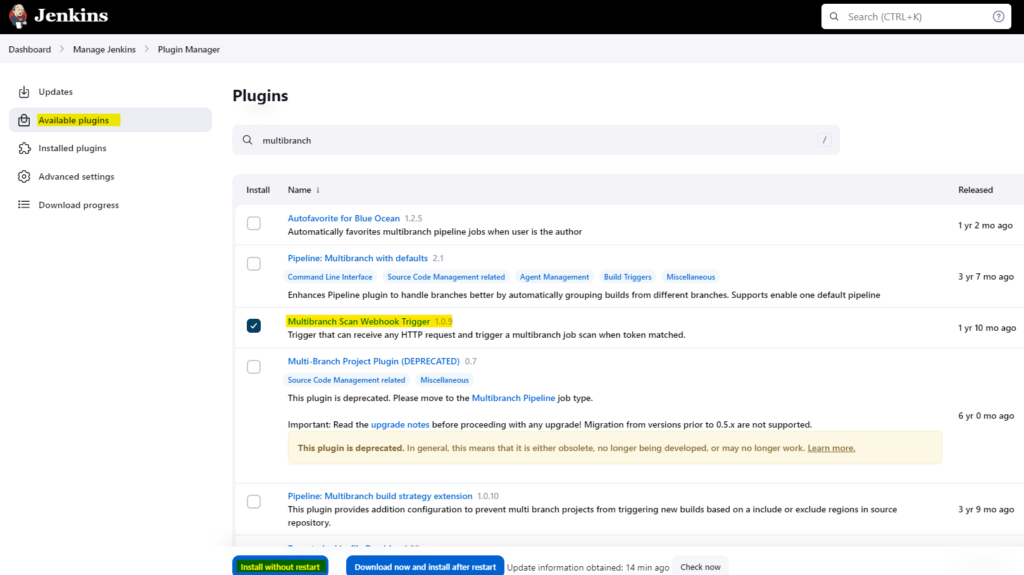
Add Multibranch Scan Webhook Trigger Plugin
In order to push Git events to trigger a Jenkins build, we need to install the "Multibranch Scan Webhook Trigger" plugin on Jenkins, which can be done by following these steps:
- Go to the Jenkins dashboard, and click on "Manage Jenkins" on the left sidebar.
- Select "Manage Plugins" from the option and click on the "Available" tab.
- In the search box, type "Multibranch Scan Webhook Trigger"
- Click on the "Install without restart" button.
Creating Multibranch Jenkins Pipeline
To begin, we'll set up a multibranch pipeline in Jenkins, allowing Jenkins to generate a separate pipeline for every branch within our GitHub repository. Follow the steps below to create this pipeline:
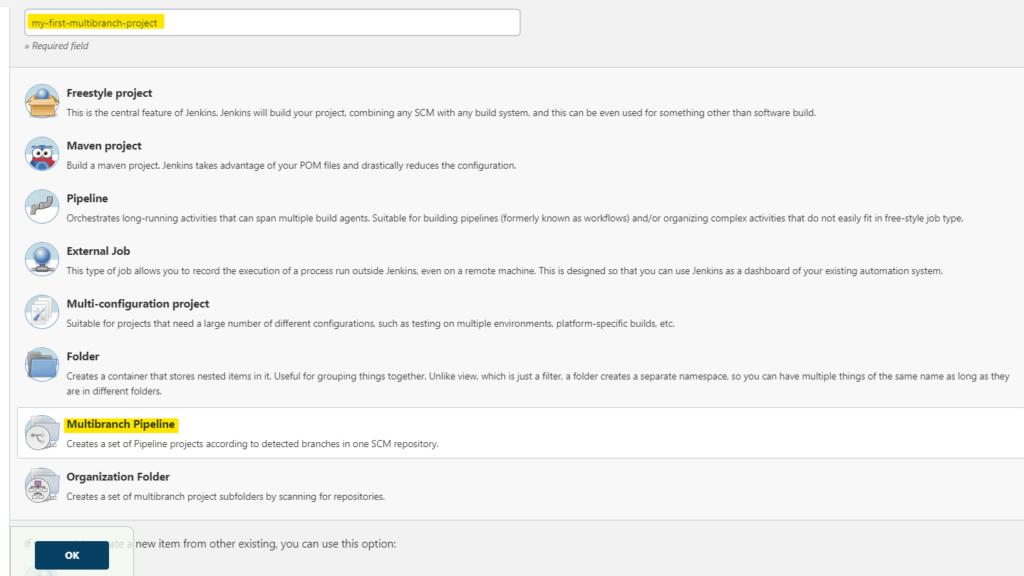
- Open Jenkins and click on "New Item" in the left menu.
- Enter a name for the pipeline and select "Multibranch Pipeline" as the project type. Click on "OK" to create the pipeline.
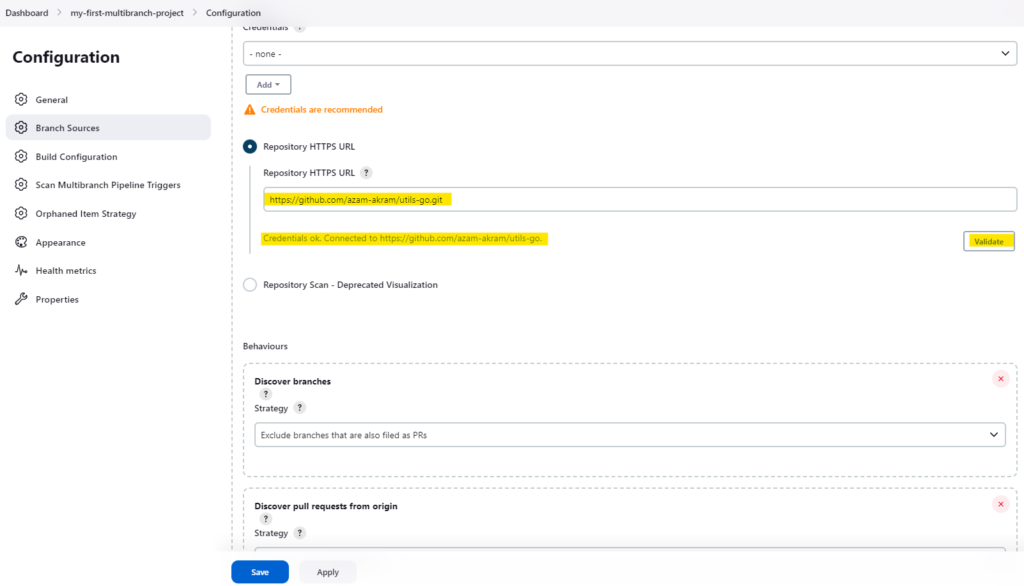
- In the pipeline configuration, under the "Branch Sources" section, click on "Add source".
- Select "GitHub" as the source type.
- Enter your GitHub repository URL and credentials (if necessary). I leave it blank for this example.
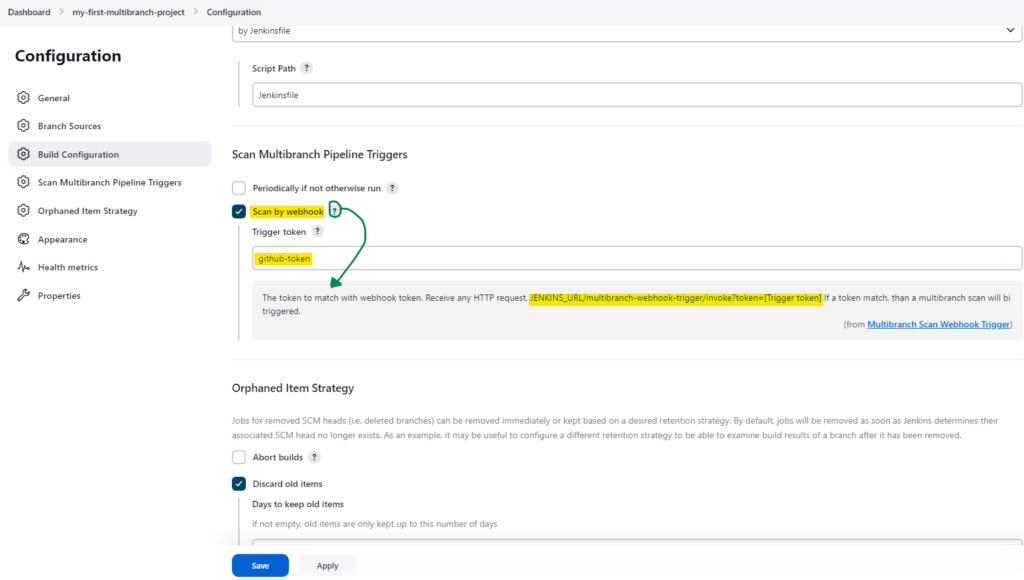
- Under the "Build Configuration" section, select "by Jenkinsfile" as the configuration type.
- In the "Script Path" field, enter the path to your Jenkinsfile.
After installing the "Multibranch Scan Webhook Trigger" plugin as described in the previous section, you should now have the "Scan by Webhook" option available in the Jenkins configuration.
We need to copy Jenkins webhook link from configuration.
- Go to project dashboard and select "Configure" from left side menu.
- Select "Scan by Webhook" option
- Choose a name for the Trigger token, such as "github-token". Click on the question mark next to the token field, and you will be provided with a URL that needs to be added as a webhook in Github. The URL will look something like this: "
JENKINS_URL/multibranch-webhook-trigger/invoke?token=[Trigger token]". Replace "JENKINS_URL" with the URL of your Jenkins server, such ashttps://jenkins.example.comorhttps://127.0.0.1:8080. Also, replace "[Trigger token]" with the name of the Trigger token you chose, such as "github-token" from the previous step.
Let's assume my jenkins URL is https://127.0.0.1:8080 and Trigger token = github-token then my webhook url would be https://127.0.0.1:8080/multibranch-webhook-trigger/invoke?token=github_token
Jenkinsfile
We added a very basic Jenkinsfile to our Git project, which includes three stages. The first stage checks the version of Go being used, the second stage looks for syntax errors in the Go repository, and the third stage runs unit tests.
pipeline {
    agent any

    tools {
        go '1.16.13'
    }

    stages {
        stage('Go Version') {
            steps {
                sh 'go version'
            }
        }

        stage('Go Vet') {
            steps {
                sh 'go vet ./...'
            }
        }

        stage('Go Test') {
            steps {
                sh 'go test ./...'
            }
        }

    }
}
Adding a Webhook in Github
In the previous section, we created an empty project for the multibranch pipeline in Jenkins. The next step is to connect this project to a GitHub repository using a webhook. Follow these steps to establish the connection:
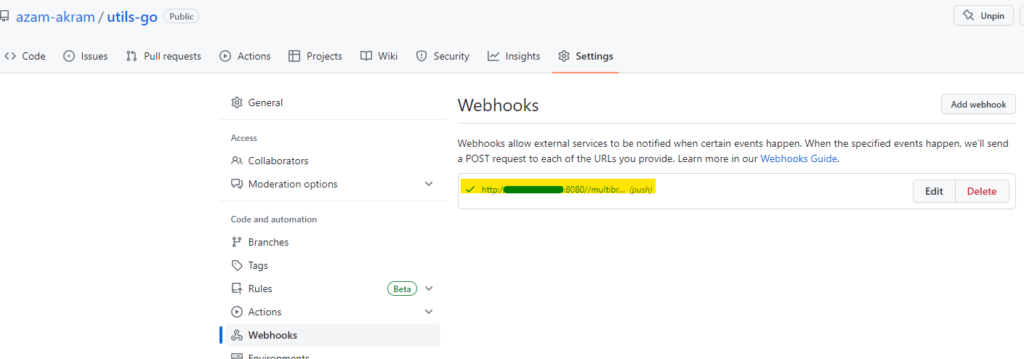
- Navigate to the github repository where you want to add the webhook.
- Click on the 'Settings' tab in the repository.
- Select the 'Webhooks' option from the left-hand menu.
- Click the 'Add webhook' button.
- In the 'Payload URL' field, paste the Jenkins webhook URL that you copied earlier, for example,
https://127.0.0.1:8080/multibranch-webhook-trigger/invoke?token=github_token - In the 'Content type' field, select 'application/json'.
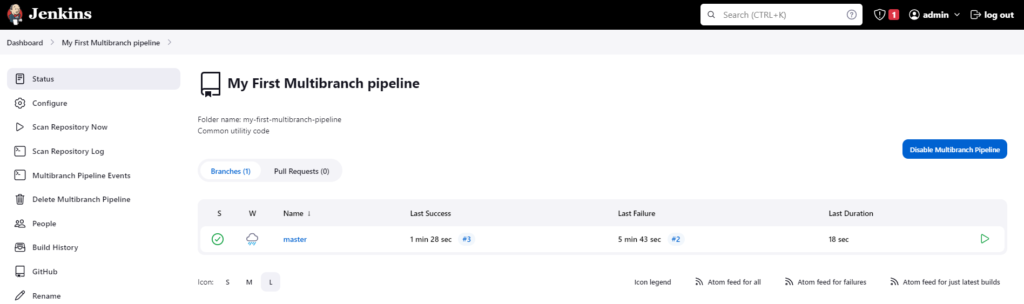
Once you have created the webhook, Jenkins will begin scanning your Git repository and creating a separate pipeline for each branch. At the moment my github repository has only one, i.e. "master" branch, so Jenkins will create a single pipeline for that branch.
To check whether Jenkins creates a new pipeline for a new Git branch, we can create a new branch in Git and observe the pipeline creation process in Jenkins.
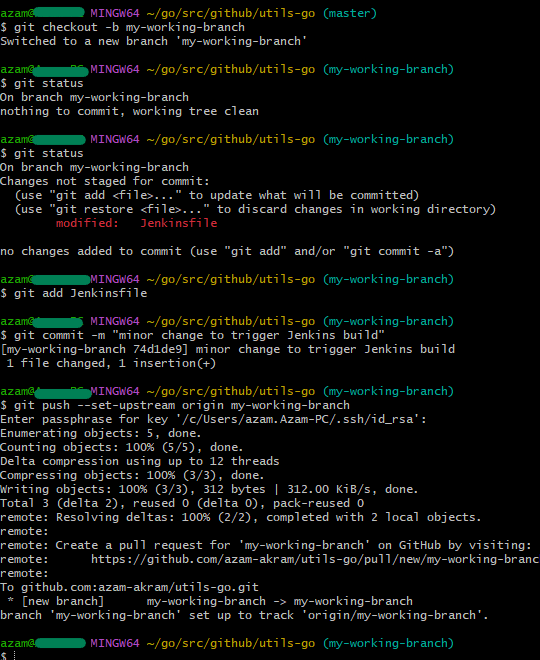
After pushing the changes to the Git origin, Jenkins will generate a separate pipeline specifically for the new branch. An example of this process is shown below:
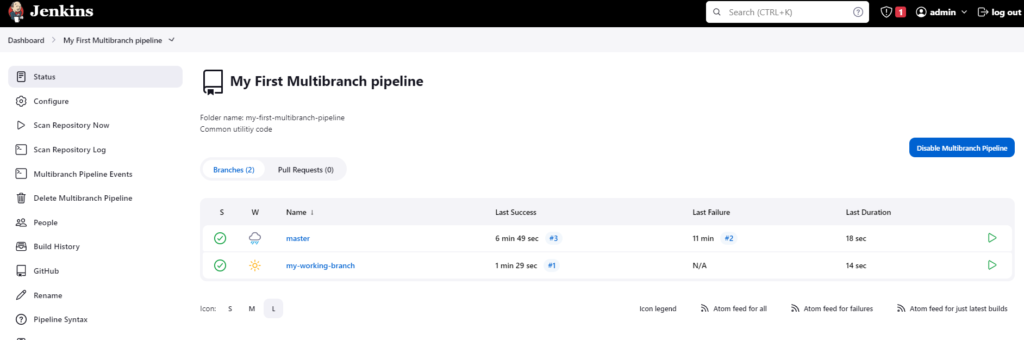
Excellent! We have now seen two separate Jenkins pipelines, each dedicated to its corresponding Git branch
Conclusion
By following the steps outlined in this article and installing the GO compiler on the Jenkins node, we were able to successfully set up a multibranch pipeline that is integrated with GitHub using webhooks. The automation provided by Jenkins simplifies the build, testing, and deployment of code, enabling developers to focus on writing high-quality software. Overall, the combination of Jenkins, GitHub, and GO provides a reliable and efficient foundation for automated software development.