
In this article, I'll explain how you can start building microservices with Go and Docker. Go proramming language has got popularity in recent times, thanks to its simple and lightweight nature, and built-in concurrency support. Its lightweight nature makes it a good choice for microservices architectures and cloud-native applications.
Docker is a leading container platform that allows developers to package applications and their dependencies into portable containers. Docker containers solve a longstanding challenge for developers by providing a consistent way to deploy and run applications across different environments. Through containerization, developers ensure that their application will run consistently across different environments, as in their local development setup.
- If you're a Java programmer considering start using Spring Boot for microservices development, I suggest reading my other article, Quick start to Spring Boot Microservice and Docker.
- And if you want to enhance your knowledge about how to write Spring Boot Microservice with Cassandra, then this post can really help.
Setting Up Development Environment
The first step in developing Go microservice with Docker is to set up your development environment. Here's a step-by-step guide to get you started:
Install Docker
If you haven't already, download and install Docker Desktop for your operating system from the official Docker website.
Create a New Go Project
Using your favorite text editor or integrated development environment (IDE), create a new directory for your Go project and initialize it with a go mod file to manage dependencies. You can find help about Set up GO Development Environment here.
We initialize a go module named, docker-app-demo-go
go mod init docker-app-demo-goThis command will create following go.mod file in your project directory,
module docker-app-demo-go

go 1.22
Write Your Go Code
We will develop a simple Go application, which consists of a handler function to handle HTTP requests. It takes two parameters: w, which is an http.ResponseWriter for sending the response, and r, which is an *http.Request containing the request details. In this function, we use fmt.Fprintf to write the response body with "Hello, World!".
package main
import (
    "fmt"
    "net/http"
)
// handler is a function that handles HTTP requests.
func handler(w http.ResponseWriter, r *http.Request) {
    // Write the response body with "Hello, World!"
    fmt.Fprintf(w, "Hello, World!")
}

func main() {
    // Register the handler function to handle requests for the root path ("/").
    // When a request is received for "/", the handler function will be called.
    http.HandleFunc("/", handler)

    // Start an HTTP server that listens on port 8080.
    // It will handle incoming HTTP requests using the registered handler functions.
    http.ListenAndServe(":8080", nil)
}
We register the handler function to handle requests for the root path ("/") using http.HandleFunc. This function tells the HTTP server to call the handler function whenever a request is received for the root path.
We start an HTTP server using http.ListenAndServe, which listens on port 8080.
If you want to build go application locally then,go build -o docker-app-demo-go .
But in this excercise we intend to containerize our go application, for that we will create a Dockerfile in next section.
Write a Dockerfile
Next, create a Dockerfile in the root directory of your project. This file contains instructions for building a Docker image that encapsulates your Go application and its dependencies.
Here's a sample Dockerfile to get you started:
FROM golang:1.23.2
WORKDIR /app
COPY . .
RUN go build -o app main.go
EXPOSE 8080
CMD ["./app"]
This Dockerfile sets up a multi-stage build process to compile your Go application inside a Docker container and create a lightweight final image.
Build Docker Image
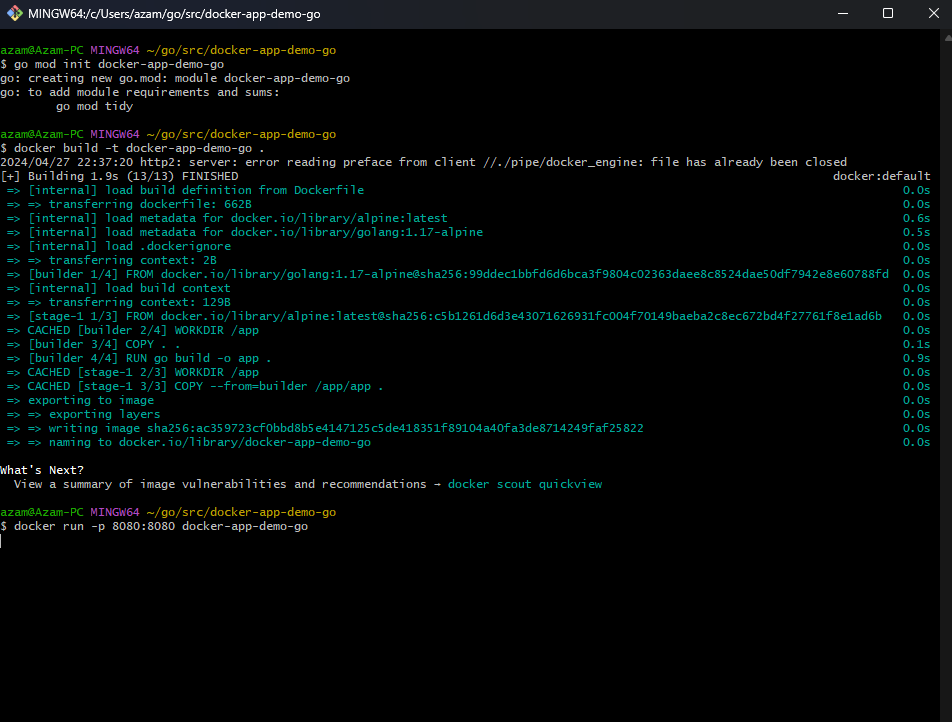
Once you've written your Dockerfile, you can build your Docker image by running the following command in terminal:docker build -t docker-app-demo-go .
This command builds a Docker image based on the instructions in your Dockerfile.
Run Docker Container
After building your Docker image, you can run a container from that image with the following command:docker run -p 8080:8080 docker-app-demo-go
This command starts a new Docker container from the docker-app-demo-go image, exposing port 8080 on your local machine and forwarding requests to the Go application running inside the container.
Lets' test this application, and open the browser and write localhost:8080 in the address bar,
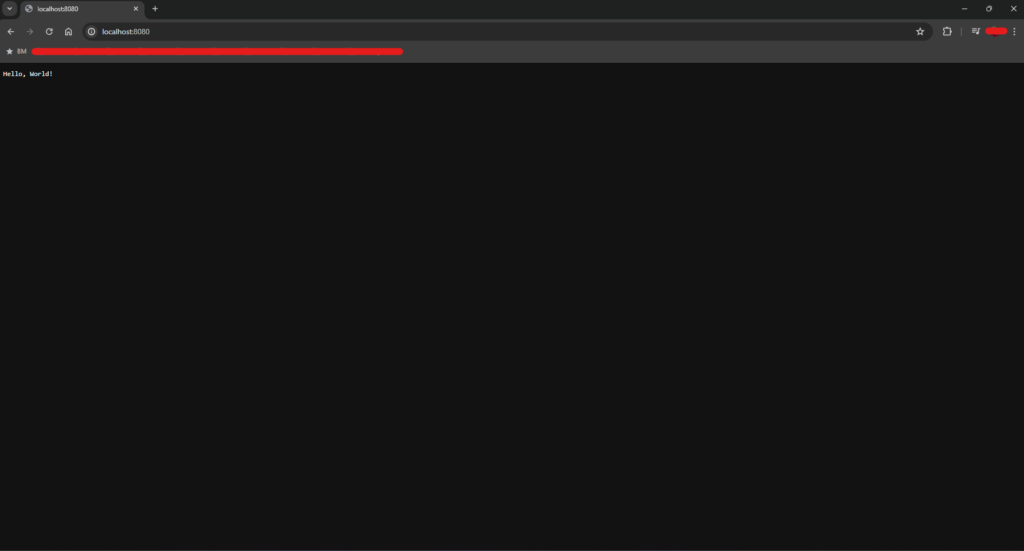
We see our Go HTTP handler functions is triggered and browser prints the response "Hello World!".
Conclusion
Whether you're building microservices, web applications, or command-line tools, Go and Docker offer a powerful combination for modern software development.
In this article, we've covered the basics of developing Go applications with Docker. By containerizing your Go applications, you can streamline your development workflow, ensure consistency across environments, and deploy your applications with confidence.