This document is designed to provide a quick start to spring boot microservice and docker. We will create a simple Spring Boot application using Spring Initializr in VS Code, add a controller to handle HTTP GET requests, and then create and run a Docker image using the command line and Docker Compose.
In the previous article, I explained how to set up a Spring Boot development environment in VS Code. I recommend reading that first for additional context.
Create a application
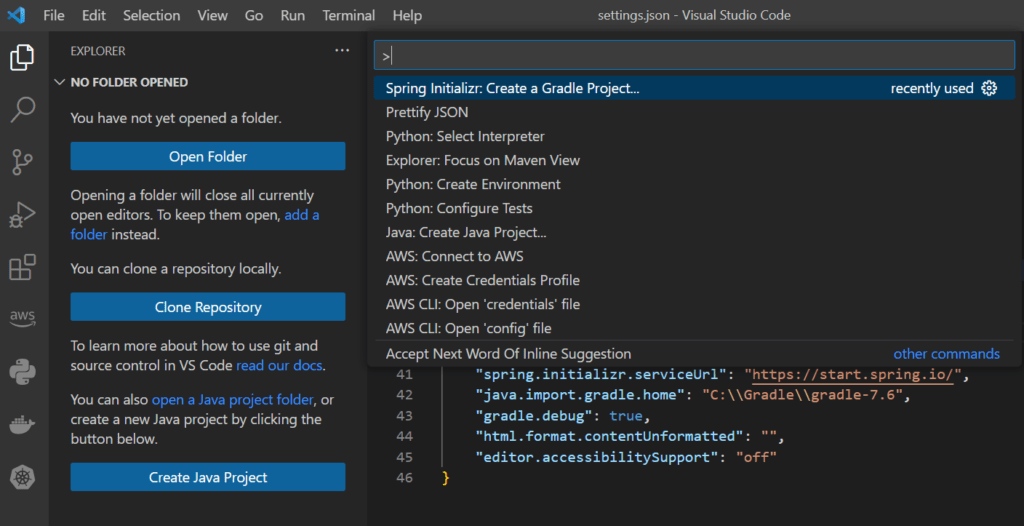
Let's create a new spring boot project in VS Code.
- Open command palette by typing
Shift + Ctrl + Por justF1 - Write "Spring Initializr: Create a Gradle Project"
- In the next steps, write your project
groupId,artifactand other project details - Select
Javaas language,version 19, andJaras packaging type
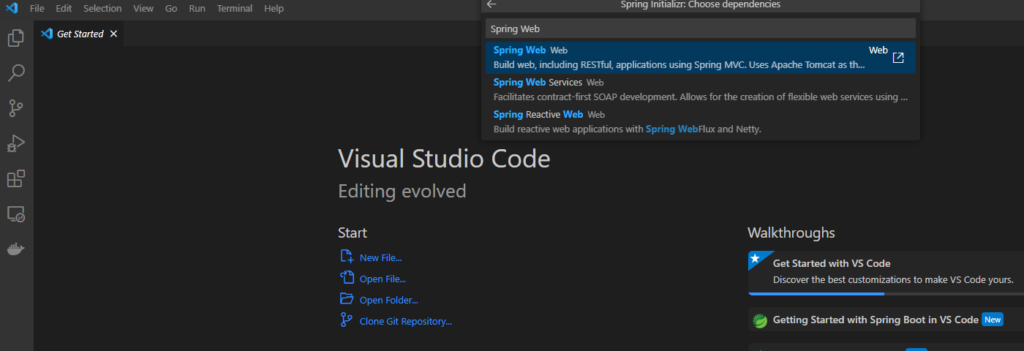
- Add project dependencies, for this example we need only
Spring Weband select.
Just press Enter and save the project at any suitable location.
That's it!
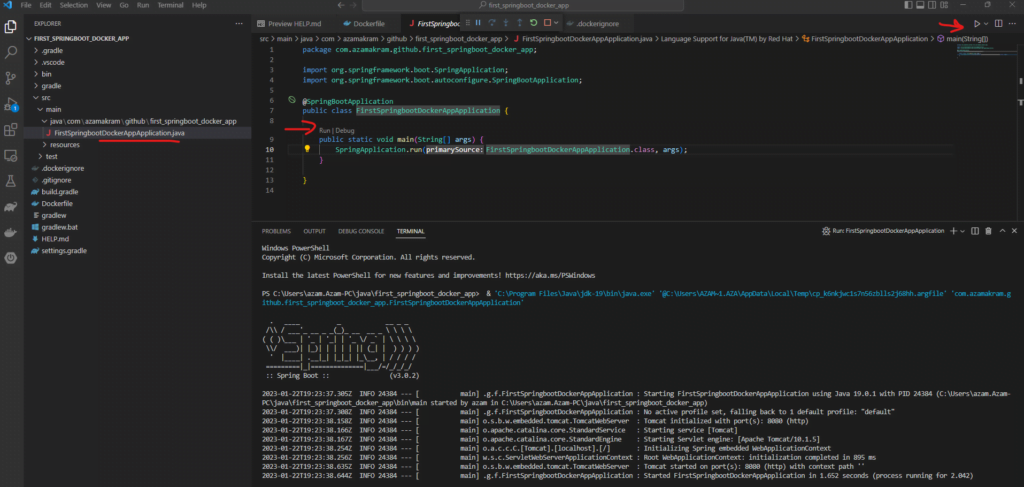
Spring Initializr will create a skeleton of a Spring Boot application. You can run the application to verify if everything looks good.
Application Configuration
We need to add an application configurations file, application.yml under src/main/resources. As this is very basic application, we just add following configurations,
application.api.version: to define API version, in this case v1.server.port: which port to listen for HTTP requestsserver.servlet.context-path: to add a sub-path to the main API URL. For simplicity I just add API version, i.e./v1. This will make API URL likehttp://<hostname>:8888/v1
application:
  api:
    version: v1
server:
  port: 8888
  servlet:
    context-path: /${application.api.version}
Adding a controller
Running a basic application is not enough; our application should serve a purpose. Let's add a controller class with a single method that handles REST API GET requests.
- Add a new folder
controllerat the same level as yourApplicationclass. - Add a new class
MyFirstController.java - Add
@RestControllerannotation over class, which will enable this class to receive the REST API requests. @RequestMapping(path = "/message"): indicates that all the API calls tohttp://<hostname>/v1/messageshould route to this class- We add a single method in the class named,
getHelloMessageString()- which accepts a path variable -@PathVariable(value = "name")- and return a text string,produces = MediaType.TEXT_PLAIN_VALUE - This method accepts a name as a path variable and returns
Hello <name>!text message.
package com.azamakram.github.first_springboot_docker_app.controller;

import org.springframework.http.MediaType;
import org.springframework.web.bind.annotation.GetMapping;
import org.springframework.web.bind.annotation.RequestMapping;
import org.springframework.web.bind.annotation.RestController;
import org.springframework.web.bind.annotation.PathVariable;

@RestController
@RequestMapping(path = "/message")
public class MyFirstController {
    @GetMapping(path = "/{name}", produces = MediaType.TEXT_PLAIN_VALUE)
    public String getHelloMessageString(@PathVariable(value = "name") final String name) {
        return "Hello " + name + "!";
    }
}
Let's run the application and send a HTTP GET request via Postman, CURL or any HTTP client,
http://localhost:8888/v1/message/azam
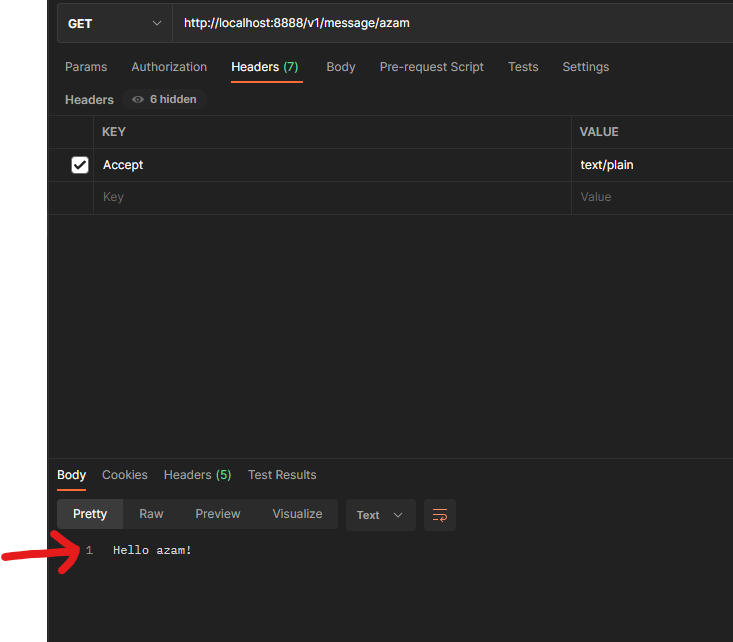
API returns "Hello azam!" message and 200 OK HTTP code.
Great!
Building Docker Image
We know our application is working; now it's time to package it as a Docker image and run it in a Docker container.
First we build our application using gradle wrapper,
./gradlew clean buildit will create a new .jar file under path build/libs i.e. build/libs/first_springboot_docker_app-0.0.1-SNAPSHOT.jar
Create a Dockerfile (no extension) at the root level of the project,
FROM eclipse-temurin:19-jdk-alpine
EXPOSE 8080
ADD build/libs/first_springboot_docker_app-0.0.1-SNAPSHOT.jar /app/first_springboot_docker_app.jar
WORKDIR /app/
CMD ["java","-jar","first_springboot_docker_app.jar"]
Explanation:
FROM: tells docker to getjdk19image (eclipse-temurin:19-jdk-alpine) because that will be required to run this application inside the containerEXPOSE: Docker container is required to expose port 8080 (used for web servers)ADD: we want to add/copy our application.jarfile frombuild/libslocation in local machine to container's/app/locationWORKDIR: we explicitly telling docker to run application from/app/locationCMD: is the command docker needs to execute to run our application. In this case we want to run our.jarfile.
we are ready to build docker image of our application,
docker build -t hello-message-service:latest .
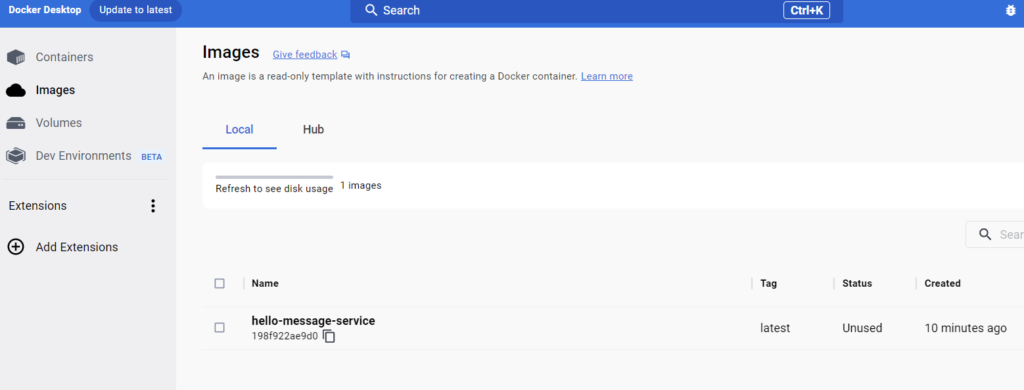
A new docker image named hello-message-service with tag latest is created. We can check the newly created image by,
docker imagesor see in Docker Desktop application
Run docker image
Before running our docker container, we can check which docker containers are running at the momnet
docker psAs we haven't run our image yet, so we will get an empty list. Let's run it now,
docker run hello-message-service -p 8888:8888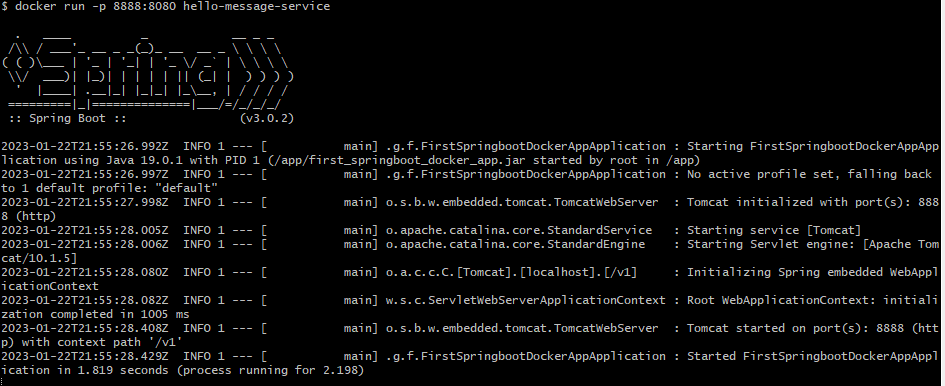
Using docker-compose
In addition to run docker from command line we can use docker-compose, which is a tool to run multi-container docker applications. In this example we have only one docker image, but in the real world, we may run multiple images in the container, for example our microservice may need an image of a SQL database, or it needs to register itself to consul so that other microservice may discover it.
We create a docker-compose.yml file at project root level and write following,
version: '3.9'

services:
  hello-message-service:
    image: hello-message-service
    build:
      context: ./
      dockerfile: Dockerfile
    ports:
      - "8888:8888"
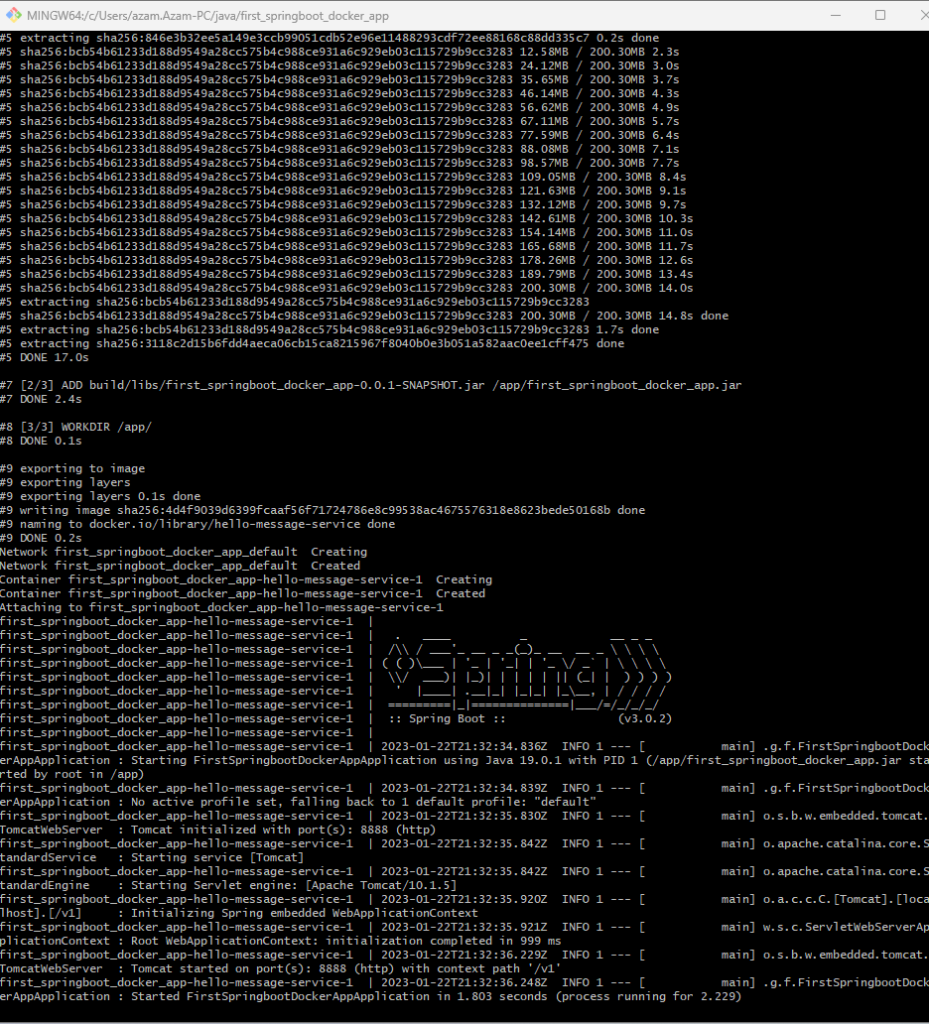
We name our image as hello-message-service and tell the docker to build an image from dockerfile: Dockerfile in current directory context (./).
docker-compose will also run the docker image. We have mapped local machine port 8888 to container port 8888. It is important to understand the difference between a local machine and the container. We can assume a container as a "mini stand alone machine" inside our local machine. Our local host ports do not automatically map to the container ports.
Time to test our application running in a docker container through Postman, this time I send "docker-compose" as a name value in the path variable and the application returns "Hello docker-compose!" message.
Now it's time to test our application running in a Docker container using Postman. I'll send docker-compose as the name value in the path variable, and the application should return the message "Hello docker-compose!"

I hope this post has helped you learn how to get started with Spring Boot microservices and package them using Docker. We've also explored how to use a Docker Compose file to package multiple images and automate the process of running containerized applications.
You can learn more about how a Spring Boot application interacts with a Cassandra database by reading this guide: "Spring Boot Microservice with Cassandra – Containerized by Docker"