This article will guide you through the seamless process of hosting a wordpress website using AWS Lightsail. You will learn about how to register and configure a website domain using AWS Route 53, host the website using AWS Lightsail, and install an SSL certificate to support HTTPS.
If you're seeking guidance on how to get started with AWS free tier account, I highly recommend reading this article first.
Though WordPress itself provides web hosting services, people can think of other service providers as well - AWS Lightsail is one of them. I will not write the pros and cons of different hosting services, it is up to you to decide. But before proceeding with the Lightsail option, you must have a good understanding of the AWS pricing model, which is quite different from traditional web hosting services.
Amazon Lightsail provides an easy-to-use, secure, and scalable web hosting service. It sets up most of the required resources such as web servers, databases, containers, storage, etc in literally few clicks. We can use pre-configured blueprints such as WordPress environments, LAMP, etc.
No further context, let’s get things done...
Register/Transfer Website domain
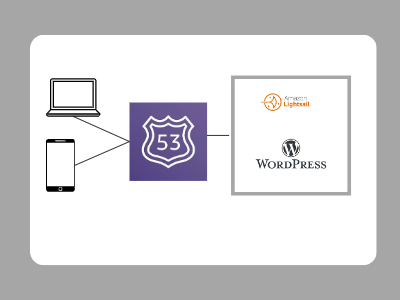
First of all, we need a website domain, like example.com, which we can register either using AWS Route 53 or other hosting services - If you have already registered a domain using another hosting service, Route 53 gives the option to transfer a web domain.
- Sign in to the AWS management console
- Search “Route 53” and open it in the AWS management console
- On the dashboard, find “Domain Registration” OR “Transfer Domain” from the left side menu

- If your desired domain name is available, you will be navigated to the payment stage and will receive a notification once the domain is registered - this may take a few minutes.
At this point, I assume you already have got your domain name registered or transferred into Route 53.
For the time being, we just pause further changes in Route 53 and move to AWS LightSail to start our WordPress instance. We will return to Route 53 again after setting up the Lightsail instance.
Setup AWS Lightsail instance

Search Lightsail in the AWS management console and follow these steps,
- Create a new Lightsail instance
- Select Linux/Unix instance image (I prefer, but you can also select windows)
- Select “Wordpress” from the list of blueprints

- Choose your monthly price plan, I would recommend the low price in the beginning unless you have other requirements.

- Give any identification to this instance
- Keep the default setting for other fields, or change it according to your need.

- Hit the create instance button, it may take a few minutes to set up.
- Once it is done you should see

- Lightsail should set up an instance hosting a Wordpress application. It should also set up the Wordpress administration dashboard for your new website.
So Simple!
Test Wordpress admin dashboard
Open the web browser and access your Wordpress admin dashboard by,
http://<your-ip-address>/wp-admin.php
A Wordpress login window will pop up, but where do you get login credentials from?
The default user name is “user”
But to get the password, we will connect to the lightsail instance using SSH, press the orange button below,

It will create an SSH session to lightsail instance,
Next, write the following command in the SSH terminal to get the password,
cat $HOME/bitnami_application_password
This will return a password in plain text, note it down.
Now we know the user name user and password, we can log in to the Wordpress admin dashboard on this URL
http://<your-ip-address>/wp-admin.php
You can access a “welcome” web page on the URL http://<your-ip-address>
Wait - there is a gap here - AWS assigns a public IP address to lightsail instance, which might be changed if the instance is restarted. We need to create a Static IP (Elastic IP) address, which does not change on instance restart. AWS provides a free static IP address with a lightsail plan.
Create a Static IP address
In your Lighsail instance page, find the Networking tab, and then press “Create static IP”.
Now we can access our Wordpress admin page using static IP, http://<your-static-ip-address>/wp-admin.php
But do you want to access your website by IP address? What happened to the domain you registered on Route 53?
Now is the time to go back to Route 53 configuration and add a couple of DNS records to configure the domain name to this static IP address.
Configure Domain name in Route53 register
Go back to Route 53, and select the Domain we registered earlier. We need to add at least 2 DNS records (you can add subdomains as well),
- Address (A) record: First we configure our domain name such as example.com to IP address - Leave the “Record name” text box empty, unless you want to configure a subdomain. Write your static IP address in the “Resolve to” text box.
- Canonical name (CNAME) record: A canonical name maps an alias or subdomain such as www.example.com to an IP address. We will add a new CNAME record and write www.<your-domain>.com in the “Record name” and static IP address in the “Resolve to” field.
Route 53 registrar may take a few minutes before you can access your webpage using the domain name.
http://<your-domain>.com
Congratulations!!
But have you noticed that I have been using HTTP instead of HTTPS? Do we want to expose our new website to hackers in unsecured transport? No, we must use HTTPS to have network traffic in a secure channel.
Install SSL certificate to support HTTPS
To use HTTPS we have to install an SSL certificate on our website in Lightsail.
We will again connect to Lightsail using ssh
And then write the command
sudo /opt/bitnami/bncert-tool
Provides the domain name like <your-domain.com> to install the SSL certificate.
Now you have made a big step to make your website secure, though there are a few other things you need to do that are not in the scope of this document.
I hope you find this document helpful. In the end I would recommend again to understand AWS pricing for Lightsail and Route 53 before going to this option.